Create your first ERP instance
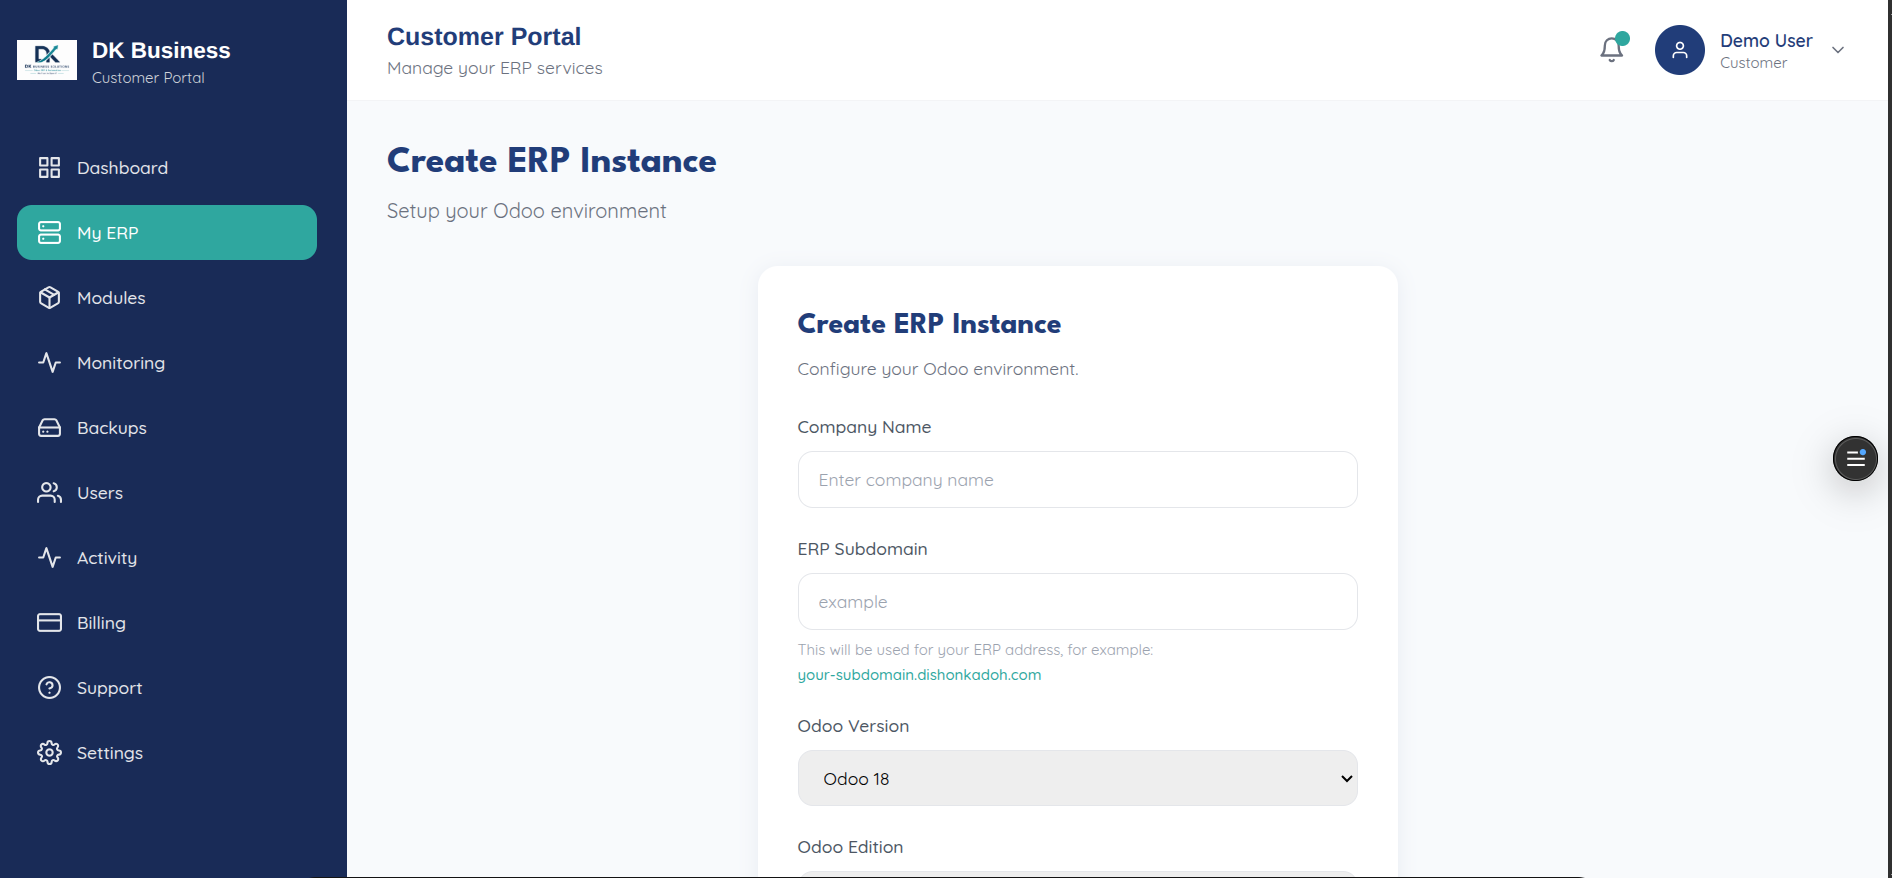
From /instances/create (Create ERP Instance — *”Setup your Odoo
environment”**), fill in:
Field |
Notes |
|---|---|
Company name |
Used to label the instance |
ERP Subdomain |
Your instance will be reachable at |
Odoo Version |
Odoo 18 or Odoo 19 |
Odoo Edition |
Community (free, core modules) or Enterprise (paid, extra modules) |
Hosting Backend |
Currently Docker only — Kubernetes hosting is temporarily disabled in the UI |
If you arrived here from the plans page, a banner confirms which plan you’re setting up (name, billing cycle, users, storage) above the form.
Provisioning
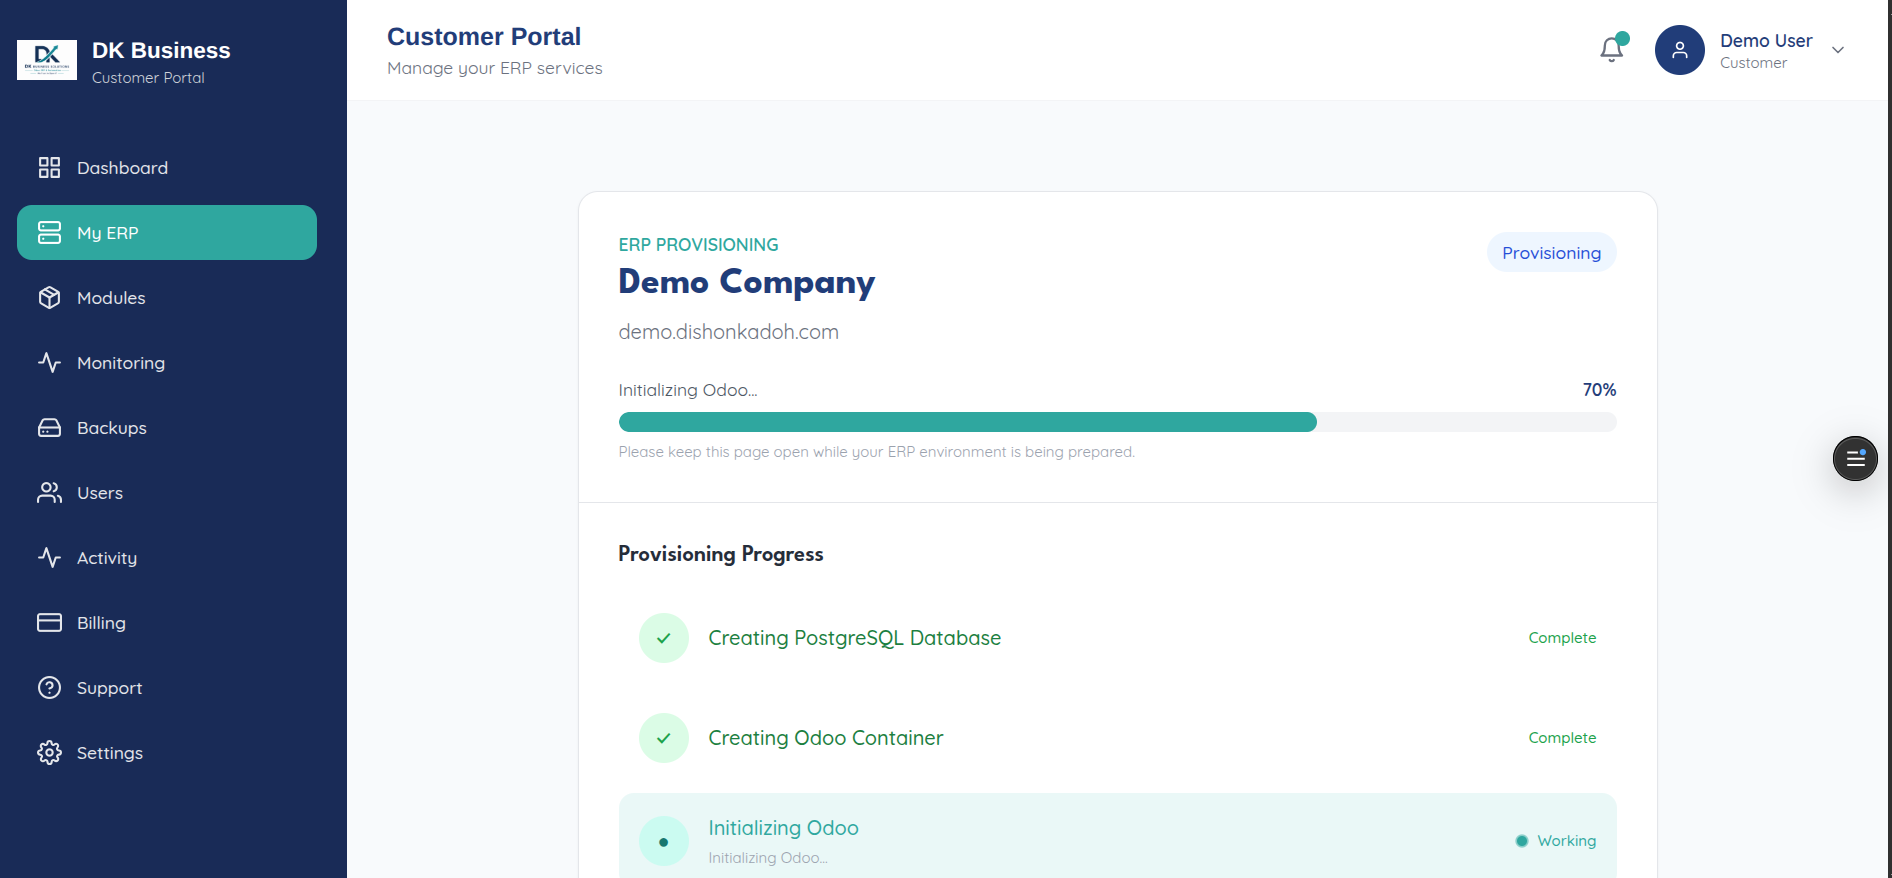
After you submit, you’re redirected to /instances/<id>/provisioning, which
polls status and walks through five stages:
Creating PostgreSQL Database — preparing your dedicated database
Creating Odoo Container — creating your isolated Odoo environment
Initializing Odoo — starting Odoo and preparing your ERP environment
Finalizing Tenant — completing final configuration
ERP Instance Ready — your environment is ready to use
Once it reaches “ERP Instance Ready”, an Open ERP button appears — see Access your ERP.
For the underlying API call, see POST /api/instances/create in
Instances (API reference).